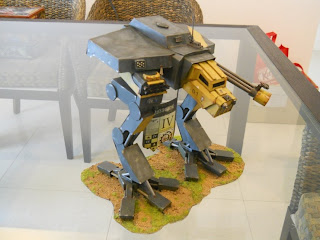
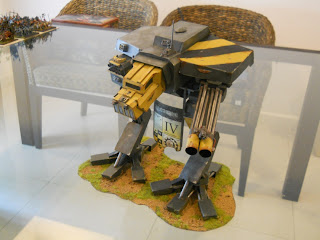
This is the final version of my scratch built Warhound project. It looked decent enough for any Apoc games and well, I think it was not bad for my first tryout. I've identified few areas that can be improved in future projects especially in the leg joints and weaponry. I'm planning to build 2 more by the end of this year and maybe, just maybe a Reaver Titan. They will all belong to the Legio Ignatum and part of my support unit for my Cadian 7th Battle Group.
This blog is mainly dedicated to my Warhammer 40k/30k hobby and other hobby endeavors.
Tuesday, January 25, 2011
Tuesday, January 4, 2011
Scratch Built Warhound Titan
Happy New Year everyone! The title says it all. Yep, a scratch built titan! I was cleaning up my lap top for trash files and I found out that I've a blueprint cutout to build a Lucius Pattern Warhound. So why not start the new year by building this titan. I have other projects in the pipeline including a Cadian 7th Armored Company but I'll start with the titan for now. Like most scratch build models, you just need the basics; A4 cardboard paper, PVA glue, scissors, spare sprues and patience.
Its pretty easy building it and the only hard part was waiting for the glue to dry up which can be time consuming. First, I printed the cutout on the A4 cardboard paper, cut it out and ready for assembly.
I started the assembly process parts by parts and I started off with the titan foot, shin and leg.
The second phase were assembling the warhound's waist and leg brace.
The final phase, assembling the body, hull, head and titan weapons. You can fit the warhound with 2 weapons from 4 weapon selections, I choose the Turbo Laser Destructor and Vulcan Mega Bolter
I haven't decided on the color scheme for the warhound but I primed it nonetheless with Tamiya Luftwaffe Grey Violet spray.
That's about it folks. It took me 2 days to finish the assembly but seriously it wasn't that hard and it cost me dirt to build it lol! I've shared the PDF file on Scribd, check out this link DIY Warhound Template. I would like to thank JSV (dunno his full name) for the template and finally always support Games Workshop and its affiliates. May the new year brings more bloodshed in the 41st millennium! For the Emperor!
Laters..
Its pretty easy building it and the only hard part was waiting for the glue to dry up which can be time consuming. First, I printed the cutout on the A4 cardboard paper, cut it out and ready for assembly.
I started the assembly process parts by parts and I started off with the titan foot, shin and leg.
The second phase were assembling the warhound's waist and leg brace.
The final phase, assembling the body, hull, head and titan weapons. You can fit the warhound with 2 weapons from 4 weapon selections, I choose the Turbo Laser Destructor and Vulcan Mega Bolter
I haven't decided on the color scheme for the warhound but I primed it nonetheless with Tamiya Luftwaffe Grey Violet spray.
That's about it folks. It took me 2 days to finish the assembly but seriously it wasn't that hard and it cost me dirt to build it lol! I've shared the PDF file on Scribd, check out this link DIY Warhound Template. I would like to thank JSV (dunno his full name) for the template and finally always support Games Workshop and its affiliates. May the new year brings more bloodshed in the 41st millennium! For the Emperor!
Laters..
Subscribe to:
Posts (Atom)